Teach Me How to Reverse Part 0
A windows machine capable of running IDA Free.
HxD or your favorite Hex editor.
The binary we'll be playing with: Click Here
Reversing Music
BEFORE WE BEGIN:
-I didn't create the binary we're using, got it from a friend on the net.
-I didn't make any of the gifs, those are also from random places on the Internet.
-Make sure you install IDA and HxD. Just double click the installers and next-next-next until they finish.
-Extensive use of Wikipedia is used to allow readers to follow-up on certain concepts. Wikipedia is an awesome resource and if you love using it you should consider donating to it.
Useful references:
Basic x86 Tutorial
Opcode Reference
--------------------------------------------------------------------------------------------------------------------------------------------------------------------------
So there you are, doing your thing roaming the interwebz when suddenly a wild binary appears. You love wild binaries, so you decide to download it and run it for fun to see if you can get any use out of it.
You double-click the binary and get something similar to the following:
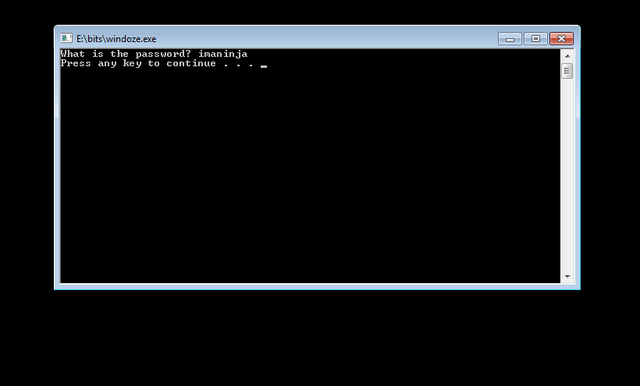
Well that sucks. You don't know the password. This is a problem that can be rather common. You're herp derping along, you stumble onto some "free" software, and the next thing you know you're being prompted for something like a license key, or a password, or a credit card.
A lot of people who do reverse engineering are motivated by their desire to crack or patch software. In this particular tutorial we'll be doing just that.
Once you've determined that the binary in question isn't going to let you extract its chocolatey goodness, you decide to throw it in IDA. This isn't a tutorial on IDA so I won't go into detail on how to operate IDA, but when you start IDA you'll see a screen that looks something like this:
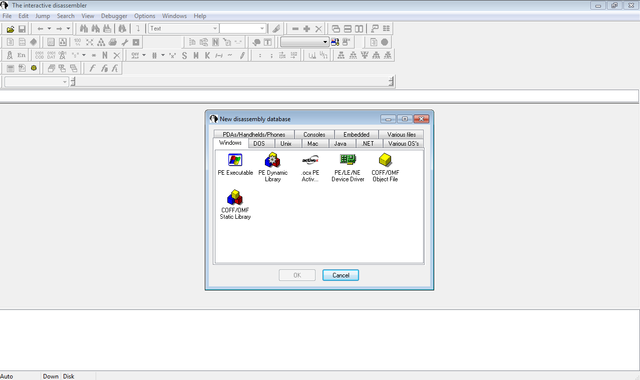
You can safely close the dialog box and then click File-->Open and Navigate to the place where you have the binary. Then click OK. You'll see another dialog, click OK here as well. If IDA asks anything about Proximity View just click no.
Once everything is loaded up you should see something similar to this:
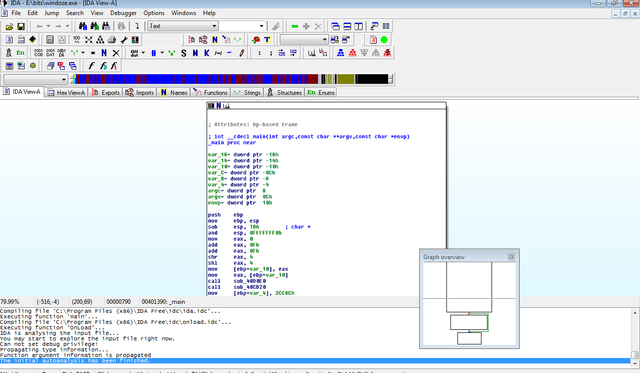
Now, if you're like me you probably don't know a ton of assembly. While it's useful to know assembly for reverse engineering, and can help you save a lot of time, it isn't always necessary depending on the tools you have available. Generally speaking you can get away with a basic understanding of programming concepts and knowledge of a few assembly instructions. Note: I'm not suggesting that you can be a career reverse engineer without being able to understand machine instructions. In fact, I'd argue that you can't even be a good one without it. At the most basic level, if you want to reverse engineer software you must have a good understanding of data representation (memory and how its allocated and organized), and how code is executed (operating system mechanics and machine instructions).
Starting out, however, if you understand :
programming is basically about manipulating data
programs always involve some kind of structured/organized data
flow control constructs and how they control data manipulation
you can reverse engineer a binary without being an expert on assembly or memory.
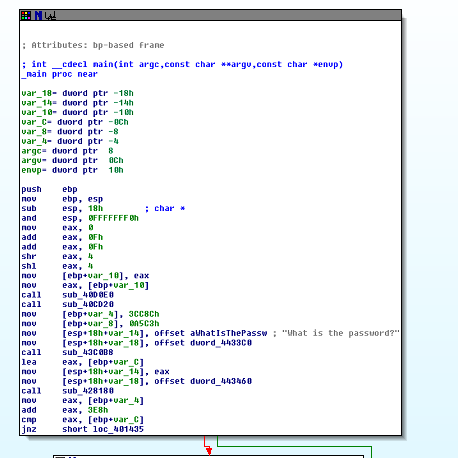
In the case of this program, we can determine what it does without understanding the instructions at a deep level. In fact, this particular binary can be understood just by looking at the flow of it. Note that are three blocks. The first block is the one which asks for the password and is shown below:
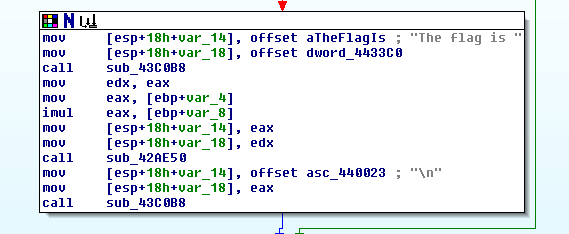
The second block is one that tells us what the flag is and is shown below:
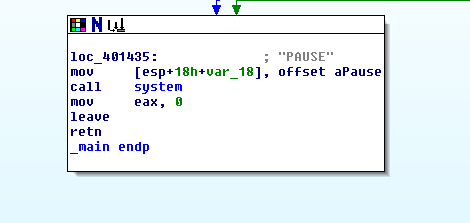
The third and final block presumably closes things out and exits the program and is shown below:
The format in which IDA has represented the instructions for the program is commonly known as a control flow graph. This graph allows us to see the way the program works. Without really understanding the specifics of the instructions, we can see from just these three blocks that this program asks for a password, if it gets the correct password it prints out a flag, and if the password given is incorrect it waits for the user to hit enter before exiting.
While this example is pretty simple, it's a good sample of what reverse engineering is about. Generally when you're reverse engineering something you're attempting to figure out what the program does. Even if you eventually want to modify the software for your use, ultimately you want to get to the bits and bytes of how it accomplishes its functionality. Once you have that you're free to run with it and do what you want.
What we've done so far is a basic static analysis of the binary. Static analysis is when you examine the program without actually running it. Now, you're probably thinking "But we ran the binary?" and you're right. When you analyze a program by executing it, you've entered the realm of dynamic analysis. Usually when you're reverse engineering software, you will use a combination of dynamic and static analysis.
With this binary our goal is to modify it so that it gives us the flag. There are two ways that we can accomplish this. The first method we can use is that we can patch the binary so that it gives us the flag regardless of what we enter. The second method we can use is to run the binary in a debugger and figure out the correct password by analyzing memory when the binary does the comparison for the password.
Both methods require a little knowledge of assembly. The first requires you to know both which instructions to replace, and which instructions to add to get the desired result. The second requires you to know how to use a debugger and also be able to identify which point in the program is the right one for conducting your memory analysis. We'll go over dynamic analysis and debugging in other tutorials, so for now we'll simply patch the binary.
Take a look at the first block again:
Now, as I said above, our goal is to change the control flow of the program. So we need to focus on the part of the program shown in the following snippet:
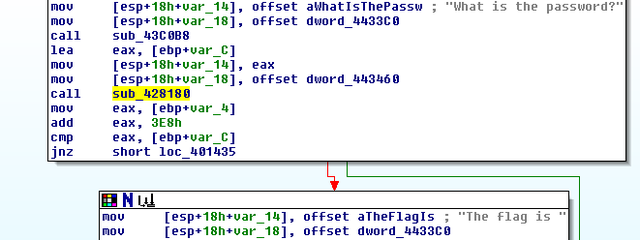
After the program prompts for the password you see the instructions:
jnz short loc_401435
What's happening here is a comparison. The binary uses the cmp instruction to compare some data at the memory location described by [ebp+var_C] to some values contained in the register eax. What the compare instruction does is basically a subtraction. It will subtract the value in [ebp+var_C] from the value in eax. If the two values are equal, the zero flag will be set in the EFLAGS register.
The next instruction, jnz stands for "jump not zero" and basically it checks the zero flag in the EFLAGS register. If it is isn't set (meaning the values being compared were not the same), then it goes to the block that does not display the flag. If it is set, then it will go to the block containing the flag. In simple words, if the password was correct, it shows the flag, if the password wasn't correct, it doesn't.
These two instructions, and their various alternatives, are generally what you will see when you have a comparison in x86 assembly. For our patching work, we will want to modify jnz to something that will always work for us. In x86 there is a jz, or jump zero, instruction, which is essentially the opposite of jnz. If the jnz is what stops the binary from displaying the flag when we get the password wrong, then by replacing it with a jz we can ensure that when we enter the wrong password the flag will be displayed. This is good becaue we don't know the password.
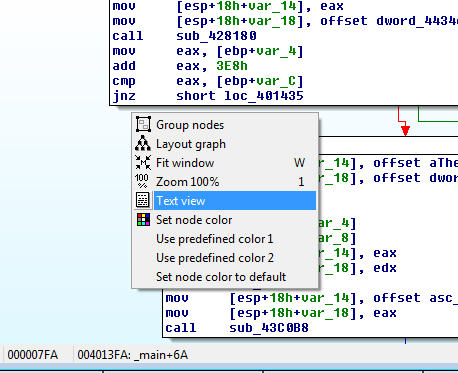
To accomplish the patching work we'll need to know that the opcode for jnz in this case is 0x75 and the the opcode for a jz is 0x74 An opcode is the hexadecimal representation of a machine instruction. We also need to be able to find the location of this particular jnz in our binary when we look at the opcodes. To do that right-click in IDA and select "Text View" as shown below:
Once you're in text view, highlight the jnz that we're interested in (the one right before the flag block) by clicking on it:

Then, change the tab to hex view:
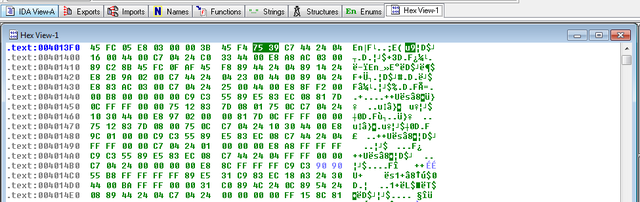
The opcodes for the jnz should be highlighted as 75 39 C7 44 24 04... Keep these handy as we'll need them in the next step.
Now open up HxD and open the binary by using the File-->Open. You should see the following:
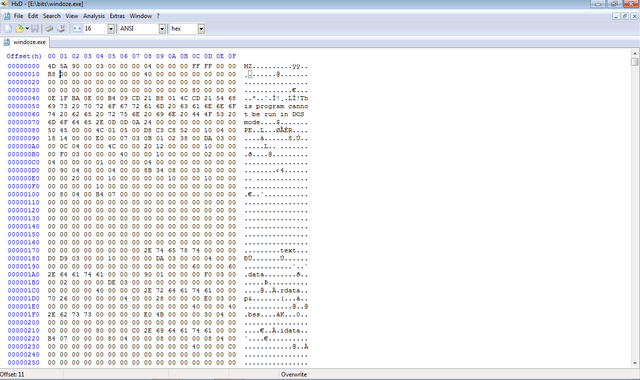
HxD is a hex editor and it allows us to look at and modify the binary at the byte level.
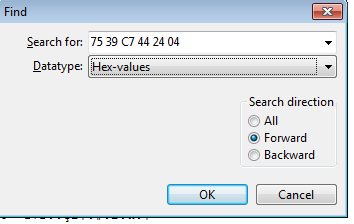
Now hit Ctrl+F and you should see a dialog. In the drop down menu change "Text-string" to "Hex-values" and enter the opcodes from earlier as shown below:
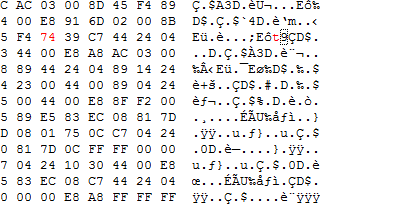
Click OK and the Hex Editor should take you to the point in the program where our jnz is found. If you're not sure you can look back at the hex in IDA to make sure the bytes match up. Once you've determined that you're in the correct spot, place your cursor right before the 75 and type 74. You should get the following result:
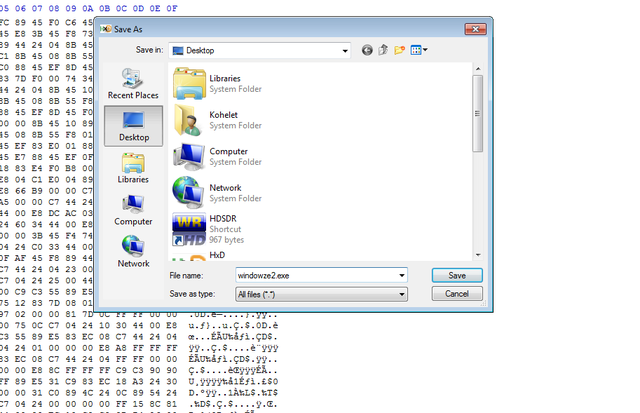
Once that's done, save the patched binary by clicking File-->Save as and choose a good location and name for it. I saved it to my desktop and named it windowze2.exe:
Now that the patching is done I can run the binary and use any password. I'll use "soldierx" in this case:
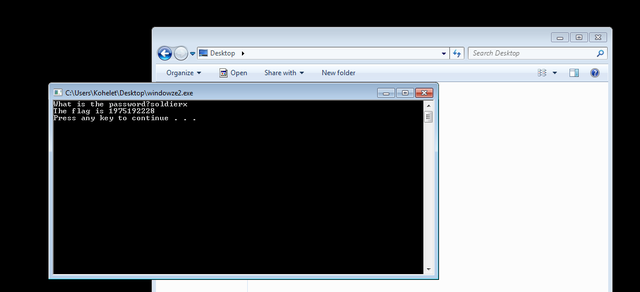
Success! Now we do our victory dance!

So that covers it. You've successfully patched your first binary! Hopefully you've gained a curiosity for reverse engineering and want to learn more. Be on the look out for subsequent tutorials. I understand that there are a lot of things I didn't cover in depth in this tutorial (instructions, memory, IDA, etc). I did this specifically because I wanted to show that it doesn't take much to get started in reverse engineering. Even if you don't know all the concepts like an expert, you can still determine useful information and even modify a binary to fit your needs. The next tutorial will cover memory and operating system mechanics as well as introduce some machine instructions and registers a little more in depth.